

What Is 3D Rendering and How Does It Work?
What Is 3d Rendering and How Does It Work?
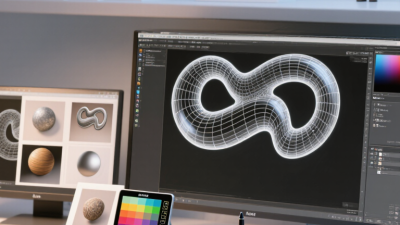
A polished product image often begins with a silent digital scene. It may contain thousands of polygons, a virtual camera, textured surfaces, and carefully placed lights. 3d Rendering turns these elements into a visible image or animation. It helps architects present an unbuilt room, engineers inspect a prototype, and artists create believable worlds.
The process starts with a three-dimensional model. Software then applies materials, such as brushed metal, glass, wood, or painted plastic. The renderer calculates how light interacts with each surface. It considers shadows, reflections, transparency, distance, and camera position. Rasterization produces images quickly, while ray tracing follows simulated light paths for greater realism. The result may appear on a laptop screen, a film frame, or a virtual reality headset.
John Lasseter, an influential computer-animation expert, said, “The art challenges the technology, and the technology inspires the art.” His observation captures a central truth about 3d Rendering. Technical power cannot replace thoughtful design. A physically accurate image can still feel cold, confusing, or emotionally empty.
Small choices matter. A softer shadow can make a kitchen feel warmer. A rougher surface can make metal appear believable. Yet rendering is not perfectly objective. Lighting assumptions, material settings, and human judgment shape every result. That part deserves more reflection. This guide examines the tools, stages, and decisions behind the final image, while recognizing that realism is useful—but not always the only goal.
Defining 3D Rendering and Its Role in Digital Visualization
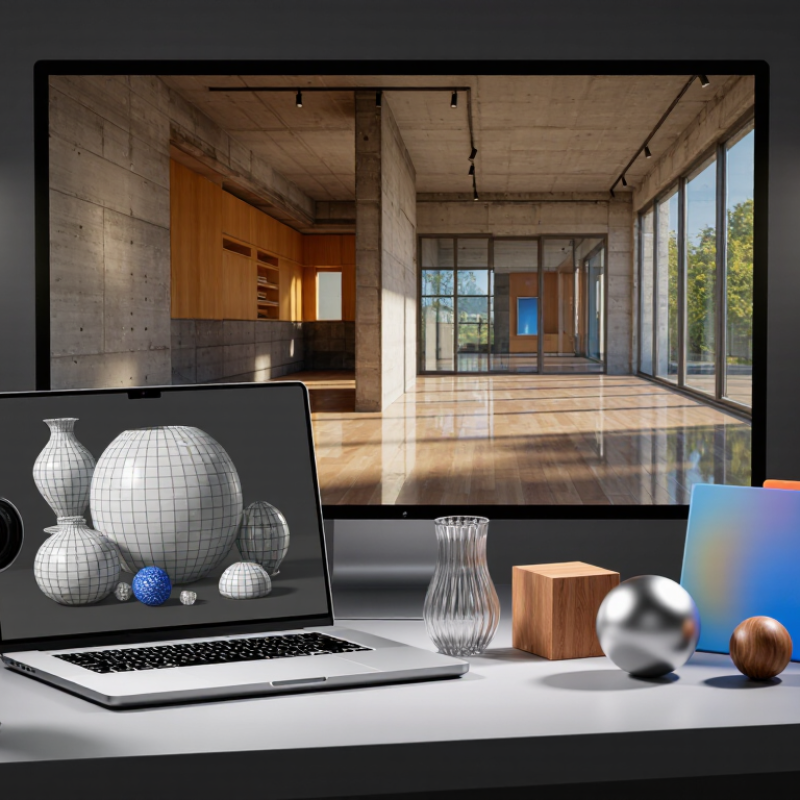
3D rendering is the process of turning digital models into visual images. It shows how objects, spaces, and materials may appear before they exist. Artists build geometry, add surfaces, place lights, and define a camera view. A rendering engine then calculates shadows, reflections, color, and depth. The result may look like a photograph, although every pixel began as data.
Its role in digital visualization is practical, not merely decorative. Architects can inspect room proportions before construction begins. Product teams can study shape, texture, and assembly details during development. Medical educators can also use controlled models to explain complex structures clearly. In professional workflows, renderings support decisions by making invisible information easier to see. However, a polished image can still mislead. Lighting may hide a design flaw, while an inaccurate model can create false confidence. Careful review remains necessary.
Tips: Use real measurements whenever possible. Check light direction against the intended environment. Show material samples beside the image. Keep a record of model changes, camera settings, and assumptions. Small mistakes matter. Ask another reviewer to inspect the scene without your explanation. Their confusion may reveal a weak visual choice. Rendering is powerful, but it is not automatically truthful. Its reliability depends on the quality of the data, the skill of the creator, and the honesty of the presentation.
The Core Elements Behind a Rendered 3D Scene
What Is 3D Rendering and How Does It Work?
The Core Elements Behind a Rendered 3D Scene
A rendered 3D scene begins with geometry. Models define the shape of a chair, room, vehicle, or human figure. Clean edges and accurate proportions matter because small errors become obvious under strong lighting. I often inspect corners closely, where stretched polygons can create strange shadows. A beautiful surface cannot fully hide weak modeling.
Materials control how objects respond to light. They describe color, roughness, transparency, and reflectivity. A ceramic cup may show a soft highlight, while brushed metal breaks reflections into narrow streaks. Texture maps add scratches, dust, fabric patterns, or faded paint. These details should support the object’s story. Too much texture can make a scene look noisy.
Lighting and cameras shape the viewer’s experience. A large area light creates gentle shadows across a wooden floor. A smaller source produces sharper edges and stronger contrast. The camera controls perspective, framing, and visual emphasis. Rendering then calculates how rays interact with surfaces, lights, and the environment. It sounds precise.
Yet precision does not guarantee realism. I have seen physically accurate scenes feel flat because the light lacked direction or the composition lacked purpose. Rendering settings also influence the result, including resolution, sampling, shadows, and reflections. Higher quality can reduce noise, but it may increase processing time. Sometimes, a slightly imperfect image feels more convincing because real spaces contain uneven light, minor damage, and visual ambiguity.
How the 3D Rendering Process Works Step by Step
What Is 3D Rendering and How Does It Work?
How the 3D Rendering Process Works Step by Step
A 3D rendering project begins with a clear brief, reference images, and measured dimensions. Artists then build a digital model from basic shapes, such as cubes, planes, and cylinders. Small details follow, including seams, handles, bevels, and surface gaps. I have found that accurate measurements matter more than impressive detail. A polished model can still look wrong if its proportions feel unfamiliar.
The next step adds materials and textures. A wooden surface needs grain direction, color variation, and a controlled level of roughness. Lighting is then arranged to reveal form without flattening the scene. A large soft light creates gentle shadows, while a smaller source sharpens edges. The virtual camera is adjusted for height, lens angle, and composition. Test renders expose problems early. A dark corner may indicate weak lighting, or it may reveal an incorrect material. Both deserve attention.
The computer then calculates reflections, shadows, transparency, and indirect light. High-quality settings improve realism but increase rendering time. A single frame may take minutes or hours, depending on complexity. After rendering, artists correct color, contrast, and small visual distractions. This stage is useful, but it can also hide mistakes. I sometimes overcorrect an image and lose the natural texture that made it believable. Reviewing the scene at different sizes helps prevent that problem.
What Is 3D Rendering and How Does It Work? — The 3D Rendering Process Step by Step
| Step | Process Stage | Main Data or Settings | What Happens | Typical Output |
|---|---|---|---|---|
| 1 | 3D Modeling | Vertices, edges, polygons, curves, and object transforms | The shape and spatial structure of objects are created in a three-dimensional scene. | A polygonal or parametric 3D model |
| 2 | Scene Assembly | Object position, rotation, scale, hierarchy, and scene units | Models are placed in relation to one another to define the complete virtual environment. | An organized 3D scene |
| 3 | Materials and Textures | Base color, roughness, metallic value, normal data, transparency, and texture maps | Surface properties are assigned so objects can respond to light like real materials. | Shaded and textured surfaces |
| 4 | Camera Setup | Camera position, viewing direction, focal length, field of view, and aspect ratio | The visible composition and perspective of the final image are defined. | A renderable viewpoint |
| 5 | Lighting | Light type, intensity, color, size, direction, and environment illumination | The scene receives direct and indirect illumination, producing highlights, shadows, and reflections. | An illuminated scene |
| 6 | Geometry Processing | Polygon data, normals, UV coordinates, visibility, and level-of-detail rules | The rendering system transforms 3D geometry into camera-space and determines which surfaces may be visible. | Visibility-ready scene data |
| 7 | Rendering Calculation | Rendering method, samples, ray depth, shadow settings, and image resolution | The system calculates pixel colors using rasterization, ray tracing, path tracing, or a combination of techniques. | A rendered image or image sequence |
| 8 | Sampling and Noise Control | Sample count, anti-aliasing, denoising, and adaptive sampling thresholds | Multiple calculations are used to reduce jagged edges and random noise, especially in physically based rendering. | A cleaner, more stable image |
| 9 | Color Management | Color space, exposure, tone mapping, white balance, and contrast | High-dynamic-range scene values are converted into a displayable range while preserving intended brightness and color relationships. | A display-ready image |
| 10 | Compositing and Post-Processing | Render passes, masks, depth data, motion vectors, color adjustments, and visual effects | Separate image layers may be combined and adjusted without rebuilding the entire 3D scene. | A finished still image or animation frame |
| 11 | Export and Delivery | Resolution, frame rate, file format, compression, and color profile | The final result is saved for viewing, editing, printing, interactive display, or video production. | Image files, video frames, or real-time display output |
Choosing Between Real-Time and Offline Rendering
3D rendering transforms digital models, materials, lights, and cameras into visible images. The rendering method shapes both the workflow and the final result. Real-time rendering produces images almost instantly. It supports interactive design, virtual walkthroughs, and quick lighting decisions. Move a light, and the scene changes immediately. This speed helps teams test ideas while discussing them.
Offline rendering works differently. It calculates each frame through a longer process. The system can simulate softer shadows, detailed reflections, hair, smoke, and complex lighting. A single frame may take minutes or hours. This method suits film scenes, product visuals, and architectural images requiring controlled accuracy. Yet more calculation does not guarantee better communication. A technically polished image can still show the wrong material or misleading scale.
Tips: Choose real-time rendering when feedback matters most. Choose offline rendering when visual precision justifies waiting. Build a small test scene before committing to a large project. Compare both methods using the same camera, light position, and material settings. Check the result on a calibrated display, not only on a bright phone screen. Keep notes about render time and settings. Small records prevent repeated mistakes. I have found that early previews can create false confidence. A fast image may hide noisy reflections or weak shadows. Revising the workflow is often necessary. The best choice depends on deadlines, hardware, scene complexity, and the viewer’s expectations.
Common Uses and Future Developments of 3D Rendering
Three-dimensional rendering converts digital models into images that resemble photographed spaces, objects, or environments. A computer calculates light, shadows, surfaces, depth, and camera position. The result may look immediate, but detailed scenes can require significant processing.
Architects use rendering to inspect a building before construction begins. A virtual room can show morning sunlight across a wooden floor, or reveal that a hallway feels too narrow. Product designers test shapes, colors, and materials without producing every physical sample. Engineers also create visual simulations for training and maintenance. In healthcare education, rendered anatomy can display layered muscles and organs clearly. These applications reduce uncertainty, although a polished image can hide practical problems.
Future developments will focus on speed, realism, and interaction. Real-time rendering may let users change walls, lighting, or furniture while walking through a digital space. Artificial intelligence could help generate textures, repair incomplete models, and predict natural lighting. However, automated results still need expert review. They may invent details that look convincing but lack technical accuracy. That risk matters in construction, medicine, and public planning. Energy use is another concern, since complex rendering demands powerful hardware and long processing times. Better algorithms may reduce this burden, but progress will not be perfectly smooth. Some predictions may age badly. Careful testing, documented assumptions, and human judgment will remain essential as rendered images become harder to distinguish from photographs.
Related Posts
-
7 Tips for Better 3D Model Rendering?
-

How to Create Stunning 3D Render Images for Your Projects?
-
Top 10 Tips for Stunning 3D Render Designs?
-
Unveiling the Power of 3D Render through Real World Examples in Design and Industry
-

How to Choose the Best 3D Rendering Services for Your Project?
-
What Are the Top CGI Rendering Types for Global Buyers?